
Create > Edges & Contour Drawings

Goal:
Learn to see things exactly as they are - the artist’s mode of seeing.
Access Prior Knowledge:
“Merely to see is not enough. It is necessary to have a fresh, vivid, physical contact with the object you draw through as many of the senses as possible – and especially through the sense of touch.” ~ Kimon Nicolaides.
New Information:
A contour is defined as a shared edge where two forms meet.

Edges are a fundamental concept in art having to do with unity. Unity is perhaps the most important principle in art. Unity is achieved when everything in a design fits together as a coherent whole, each part contributing to the wholeness of the total image.

In drawing your hand, for example, the places where the background or space meets the surface of your hand, the place where a fingernail meets the surrounding skin, the place where two folds of skin meet to form a wrinkle, and so on, are shared edges. The shared edge (called a contour) can be described – that is, drawn – as a single line, which is called a contour line.
Apply Knowledge & Skills:
Instructional Strategy
- Nonlinguistic Representations
Learning Activity
Generate mental images > Edge Exercise
- See in your mind’s eye a disassembled child’s jigsaw puzzle of six or eight painted pieces. The pieces will go together to form a picture of a sailboat on a lake. Imagine that the jigsaw pieces are shaped like the forms: a single white piece is the sail, another white banana piece the boat, etc. Imagine the rest of the pieces in your own way – land, dock, clouds, whatever.
- Now assemble the pieces in your imagination. See that the two edges come together to form a single line (imagine this as a precision-cut puzzle). These shared edges form contour lines. All of the pieces –spaces (sky and water) and shapes (boat, sail, land, etc.) – fit together to form the whole puzzle.


- Next regard your own hand, one eye closed to flatten the image (closing one eye removes binocular depth perception). Think of your hand and the air around it as a jigsaw puzzle, the spaces (negative spaces) between the fingers sharing edges with the fingers; the shape of the flesh around each fingernail sharing an edge with the fingernail; two areas of skin sharing an edge to form a wrinkle. The whole image, made up of shapes and spaces, fits together like a jigsaw puzzle.


- Now direct your eyes at one specific edge anywhere on your hand. Imagine in your mind’s eye that you are drawing that edge as a single, slow, exact line on a piece of paper. As your eyes move slowly along the edge, imagine that you can simultaneously see the line being drawn, as though by some magical recording device.
Instructional Strategy
- Nonlinguistic Representations
Learning Activity
Create > Blind Contour Hand Drawing
Concept: The blind contour method improves drawing because it causes you to use both senses of sight and touch. You should imagine that you are touching the from as you draw it
Studio Activity:
- Place a piece of paper on a table and tape it down in any position that seems comfortable.
- Arrange yourself so that your drawing hand is ready to draw on the taped-down paper.
- You are going to draw your hand without seeing what you are drawing.
- This is necessary: First focus your entire attention on the visual information actually in front of you.
- Second, remove all attention from the drawing, which might trigger old preconceived notions memorized from childhood as “the way to draw hands”.
- Very, very slowly move your eyes along the edge of your hand, observing every little variation in undulation of the edges.
- As your eyes move, also move your pencil point at the same slow pace on the paper, recording each slight change or variation in edges that you observe with your eyes.
- Be convinced in your mind that the information originating in the observed object is minutely and precisely perceived by your eyes and is simultaneously recorded by the pencil at the moment of you seeing it.

Trigger Mechanisms: Awareness, Silence, Observation


Instructional Strategy
- Nonlinguistic Representations
Learning Activity
Create > Modified Contour Hand Drawing
Concept: Modified contour drawings are similar to blind contour drawing in that the artist’s hand moves only while observing and object of study. However, during modified contour drawing, you may periodically suspend the action of drawing to examine the image to limit the amount of distortion.
Studio Activity:
- Start like a blind contour drawing and place a piece of paper on a table and tape it down in any position that seems comfortable.
- You are going to draw our own hand again. Arrange your hand in a complex position – fingers entwined, clenched, crossed or whatever.
- Be sure not to move either the position of your hand, once you have started the drawing, or your head – that is, don’t tilt your head to see part of your hand that may be hidden from view. Take a single position and stay there.
- Stare at your hand in preparation to draw. Imagine a vertical line and a horizontal line next to your hand. Observe the relationship of a single angle to either vertical or horizontal. Now look at your paper and imagine the angle as though it were drawn on the paper. Find a space, perhaps between the fingers. Gaze at that space until you see the edge of the space where it meets the edge of the finger. Try to feel the touch with your eyes.
- Fasten your eyes at any point on a contour. Check the angle in relation to vertical or horizontal. As your eyes move slowly along the contour, your pencil draws the contour on the paper at the same slow speed. Move from contour to adjacent contour. Do not draw a complete outline and then try to draw the interior forms. It’s much easier to move from form to adjacent form.
- Glance at your paper only to locate a point or to check on a relationship. About ninety percent of your drawing time should be spent with your eyes focused on the hand you are drawing, just as in the pure contour method.
- When you come to any part that you have trouble with, shift to the next adjacent shape or to the space that shares the contour you need.


Instructional Strategy
- Nonlinguistic Representations
Learning Activity
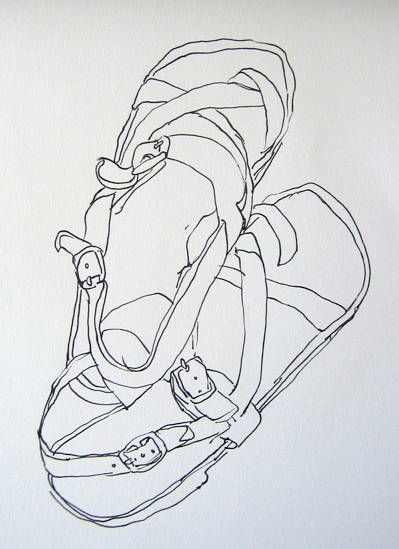
Create > Contour Object Drawing
Concept: Contour drawing is a classic drawing exercise to:
- capture the edges and details that we often overlook.
- It makes the object look more three dimensional.
- develop good hand-eye coordination which is key when learning to draw. With regular practice, contour drawing exercises will train your hand to follow your eye's movements.
- develop the right brain muscles to become more confident and aware of the observable,
- balance the left brain's tendency to standardize, generalize, and simplify everything, which creates stereotypical ways of seeing and drawing.
Studio Activity:
- Set up a still-life with a shoe, driftwood, purse or...
- Look at the object! While you draw, look at the object, 90 % of the time. Look only at your paper when you are ready to make a new line on your paper and you are checking where to place it. Concentrate on practicing your hand-eye coordination instead of worrying about the look of your drawing.
- One continuous long line. Do not lift the marker off the paper unless you go off the edge of the paper and hit the table or come to an absolute dead end. Whenever several lines meet, simply choose a direction and reconnect those lines later.
- Go as slowly as a snail. Draw slowly. If it helps, close one eye while you draw.
- Detail, detail, detail! Capture edges only, but capture as much information as you can! Capture every nook and cranny on paper. Each and every edge, crack, line, wrinkle, etc., that is possible to SEE.
- Work as close to life size as your sketchbook will allow.

Generalize, Reflect & Publish:
Instructional Strategy
- Providing Recognition
Learning Activity
Publish > your drawing to our G+Community > Concepts & Creations category
Respond > in the comment section write the following reflection.
- Think back now on how you felt at the beginning of the pure contour drawing compared to how you felt later, when you were deeply into the drawing. What did that later state feel like? Did you lose awareness of time passing? For most students, pure contour drawing produces the deepest shift into the spatial state of consciousness.
Visual Examples:
https://drive.google.com/drive/folders/0B4ASVfYVhsB3NmFmNGMxYTctOTJhMS00ZWU2LThjYWMtYWE3MjNjZTI4YThm
No comments:
Post a Comment