Wednesday, October 26, 2016

Create > Hand-colored Photographs

Create > Hand-colored Photographs


Goal: Create works that incorporate both photographs and hand-painted additions

Studio Activity:
Option 1:  Be inspired by the works of Gerhard Richter > http://goo.gl/709vrE and paint directly onto photographs.  Spontaneously use gestural smears of paint to enhance and distort your images.  Use acrylic paint with non-traditional ‘brushes’ like fingers or wrappers paint thick lines that divide the composition or inject color into the image.  Use the tactile surface of the paint smear to your advantage and draw the viewer into your works.
Gerhard Richter overpainted photographs

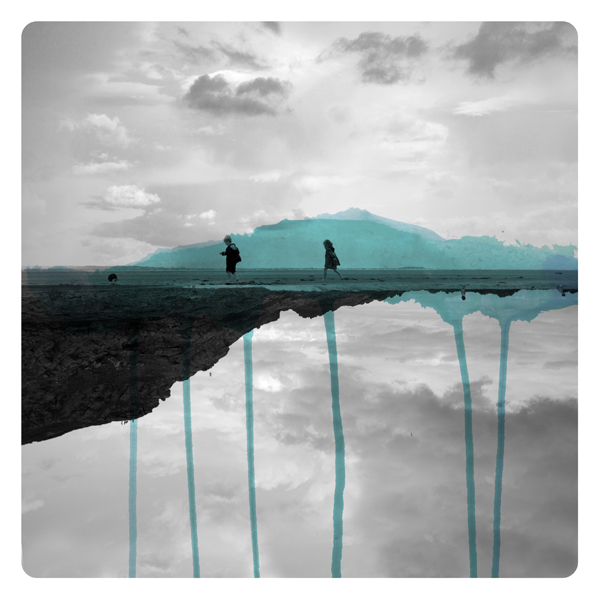
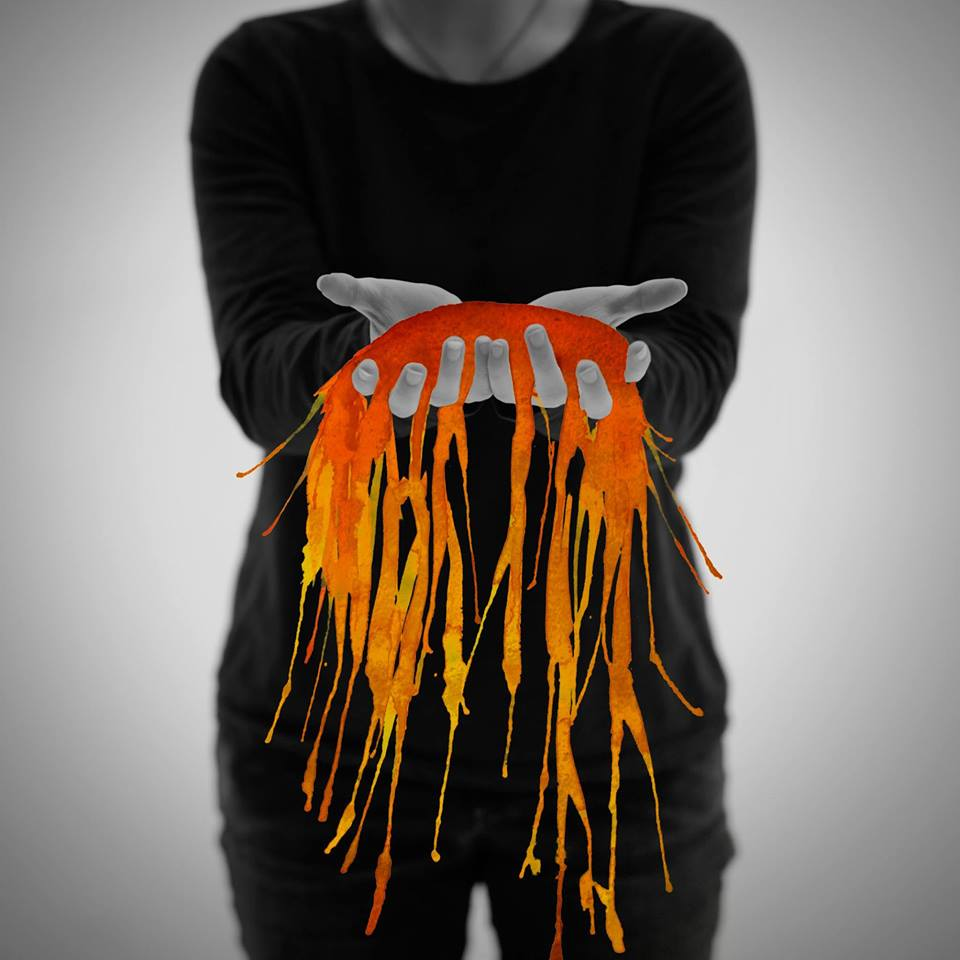
Option 2:  Be inspired by the works of Fabienne Rivory > http://goo.gl/wKfIUF.  On a standard printer, print out copies of your images in black and white and apply ink or watercolours directly to the paper.
Fabienne Rivory photography

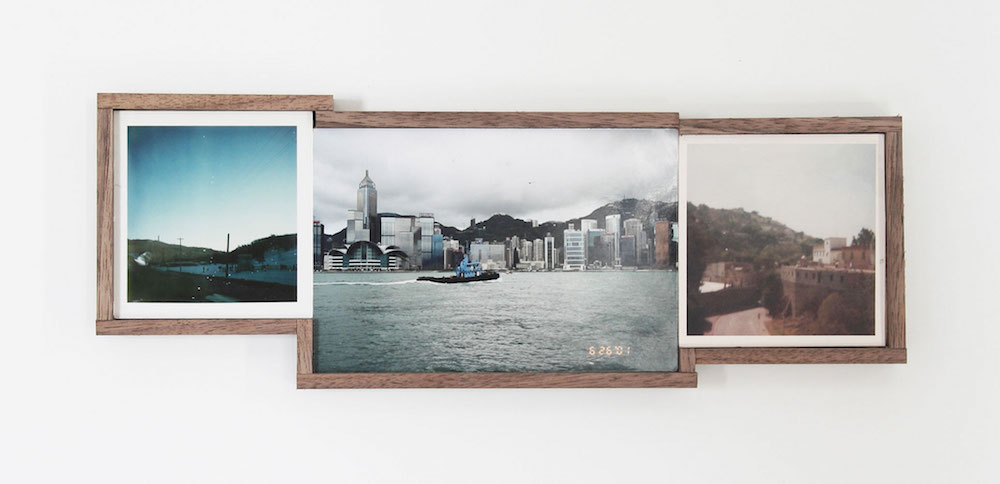
Option 3:  Be inspired by the works of Aliza Razell > http://goo.gl/ckcuSy  and redraw part of the image with paint, pencil or pen.  Similar to the other options, this technique involves more than applying painterly colors or textures to a work.  Aliza erases part of the photograph and fills it in with a hand painted image.  Most high school art students I know can also draw very well.  This technique can be a great way to show off multiple strengths.
Aliza Razell photography

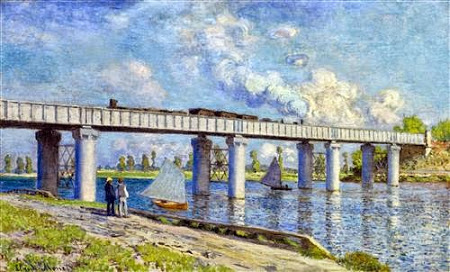
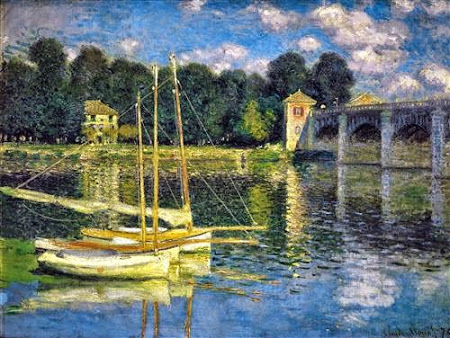
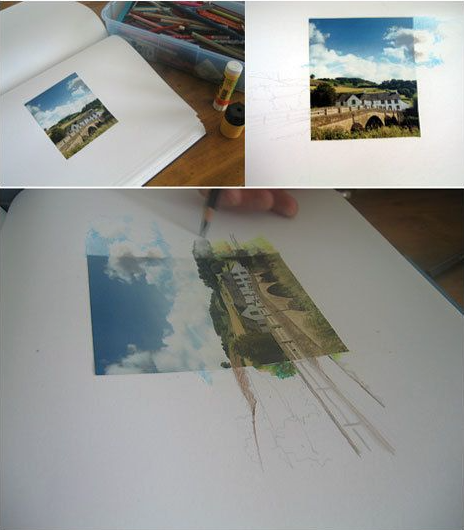
Option 4: Glue a photo or magazine picture into your sketchbook. Extend the photo out by drawing the rest. You can draw it realistically or illustrate it cartoon-like.


Trigger Mechanisms: Expressionism, abstraction, analogy & metaphor

Visual Examples:
Gerhard Richter > http://goo.gl/709vrE
Fabienne Rivory > http://goo.gl/wKfIUF
Aliza Razell > http://goo.gl/ckcuSy


Generalize, Reflect & Publish:
Instructional Strategy
  • Evaluate the results
Learning Activity
Reflect > Should I go back and rework anything?
  • How did you combine art elements (line, color, shape, texture, value)  to develop art principles? (Unity/variety, balance, emphasis contrast, rhythm, proportion/scale, figure/ground relationship)
  • Where are the dominant shapes, forms, colors, or textures that carry expressive significance?
  • Why Is the work ordered and balanced or chaotic and disturbing?
  • What gives the work its uniqueness?
  • Is symbolism used in the work to convey meaning other than what one sees?
  • Does the work evoke any feelings?

Instructional Strategy
  • Providing Recognition
Learning Activity
Publish > Share your album to our G+Community > Concepts & Creations category
Display > Add your photos to the Event

Instructional Strategy
  • Providing Feedback
Learning Activity
Critique >
  • Give positive feedback > +1 every image that deserves it
  • Give peer feedback > Give 2 peer images a VTS critique > http://goo.gl/1WWmBY
Self-assess >
Life Skills Survey > http://goo.gl/iEUqr (responses > http://goo.gl/8YDnYF)

Monday, October 17, 2016

Defining Your Concentration > Developing a long term series


Defining Your Concentration
Developing a long term series > Concentration Studio Activities
Goal Concept:
Be able to develop a long-term self-assignment concentration series.

Access Prior Knowledge:
“Great things are done by a series of small things brought together.” ~ Vincent Van Gogh

Instructional Strategy
  • Ques
Learning Activity
Watch > Start with Why >  http://goo.gl/GYRZOr      

New Information:
railway-bridge-at-argenteuil-1874.jpg!Blog.jpg
the-bridge-at-argenteuil-grey-weather.jpg!Blog.jpgi3N2xN6ISNsxBsKx9EwUimIfT7xpk8F4BvbsogfCvnM=w450-h272-no
the-banks-of-the-seine-at-the-argenteuil-bridge.jpg!Blog.jpg
the-bridge-at-argenteuil.jpg!Blog.jpg
the-bridge-at-argenteuil-1.jpg!Blog.jpg

Developing a Long-term Concentration Series
Your concentration is a commitment to the thoughtful investigation of a specific visual idea.  To document your process, you will present 12 conceptually related artworks that show growth and discovery.  Critical thinking is useful at many points in a Concentration Series.  
The following strategies will keep your art focused on your concentration idea.
View > One Brick at a Time > http://goo.gl/XjNHNh

Step 1: The Proposal

Move from Personal to Universal
Autobiography is a particularly rich source for images and ideas.  The authenticity of personal experience is extremely powerful.  However, if you focus too tightly on your own family, friends, and experiences, the viewer must know you personally in order to appreciate your design.  Try expanding your field of vision.  For example, use a story about your high school graduation to say something about all rites of passage from childhood to adulthood.

Determine Essential Concept
As a project evolves, experience and interests also evolve.  Your initial idea may expand or shift during the translation from the mind to the hand to the piece and then from piece to piece.  Pausing to reconsider your central concept and refine your image can bring great clarity and purpose to the series.
What is the concentration really about?  
You communicate more forcefully when you know what you want to say.
1. Clearly and simply state the central idea of your concentration.

Explore Polarities
A strategy to strengthen an idea is to present the exact opposite.  
To illustrate the joy a political prisoner feels on being released from jail, consider illustrating the despair she felt before her release. (now you have two art works!)
To increase the dynamism in a design, add some emphatically static elements.
The contrast created by polarities can clarify definitions and communications.
2. List polarities or opposing views of your concentration idea.

Move from General to Specific
Be Specific!  Vague generalities weaken your designs.  
Details are important.  “A bird watched people move down the street” does not have the impact or visual that “Two vultures hovered over University Avenue, hungrily watching the two hapless students stagger from the commons.”
3. Specify the types of characters, the exact setting and fully developed plot.

Edit Out Non-essentials
If your design is overloaded with secondary visual elements, the result will be cluttered and impact will be lost.  Look carefully at the visual relationships in your compositions and seek elements to emphasize.  
4.  What are the extra shapes, colors or values that can be deleted?

Amplify Essentials
After #4, strengthen the essential information.  Understand the principle of emphasis to increase your compositional power.  Try ‘going too far,’ wildly exaggerating the size, color, or texture of an important visual element.  The only way to get an extraordinary image is to make extraordinary compositional choices.
5.  What elements draw attention, bring focus and solidify meaning.

Step 2: The Essential Questions:  
Formulate provocative questions that make us think within a greater context.
How do I communicate the (natural/metaphoric)nature of….
How do I connect each...
How will _________________ affect the viewer…
How can I best use…

Develop Group Alternatives
By helping someone else solve a problem, we can often solve our own problem.  Organize a team of four or five classmates.  Working individually, design 5 to 10 possible solutions to a visual problem using 2 x 3 in. thumbnail sketches.  Then, have one person present his or her ideas verbally and visually.  Each team member must then propose an alternative way to solve the problem.  This can be done verbally; however, once you get going, it is more effective and stimulating if everyone (including the artist) draws alternative solutions.  This process helps the artist see the unrealized potential in his or her idea.  And, because of the number of alternatives presented, the artist rarely adopts any single suggestion.  Instead, the exercise simply becomes a means of demonstrating ways to clarify, expand, and strengthen intentions already formed.

Step 3: Time Management Plan.
The first thing I will do will be...
At Critique X,Y & Z I will have accomplished…
To best show the development of my series I will…

Step 4:
Written Commentary:
  1. Clearly and simply state the central idea of your concentration.  (500 character maximum)
  1. Explain how the work in your concentration demonstrates your intent and the sustained investigation of your idea.  You may refer to specific images as examples.  (1350 character maximum)

Concentration Documents from AP
Read > Studio Art Course Description > http://goo.gl/WJIhft
Read > AP Studio Art Portfolio Requirements Brochure 2014 > http://goo.gl/cDV6Jd
Read > Plan Your AP Portfolio Worksheet > http://goo.gl/PShXni
Read > Concentration Requirements > http://goo.gl/E8W7Vh
Read > AP Concentration Planner Worksheet > https://goo.gl/mBlYo0

Concentration Playbooks:
Know > SIII Concentration Playbook- 2D Design > https://goo.gl/9HZYpj
Know > SIII Concentration Playbook- 3D Design > https://goo.gl/1YAXUS
Know > SIII Concentration Playbook- Drawing > https://goo.gl/DRLLW7

Concentration Resources:
Read > Aesthetics and the Concentration > https://goo.gl/bQ2XjY  
Read > Concentration SMART Goal > https://goo.gl/051OFu  
Read > Designing a Long-term Series > https://goo.gl/NeSiUq  
Read > Qualities of a Successful Concentration > https://goo.gl/ZYqgyT


Apply Knowledge and Skills:

Instructional Strategy
  • Prepare for future experiences
Learning Activity
View and Write > Westosha Concentration Topic here > https://goo.gl/izVDBS   

Generalize, Publish and Reflect:

“As my artist’s statement explains, my work is utterly incomprehensible and is therefore full of deep significance.” ~ Calvin and Hobbes

“Art is not a thing, it is a way.” ~Elbert Hubbard

“Art doesn’t have to be pretty.  It has to be meaningful.” ~Duane Hanson

“Art is not what you see, but what you make others see.” ~Edgar Degas

Instructional Strategy
  • Identify similarities and differences
Learning Activity